Pitpet Automatic Pet Feeder Manual⁚ A Comprehensive Guide
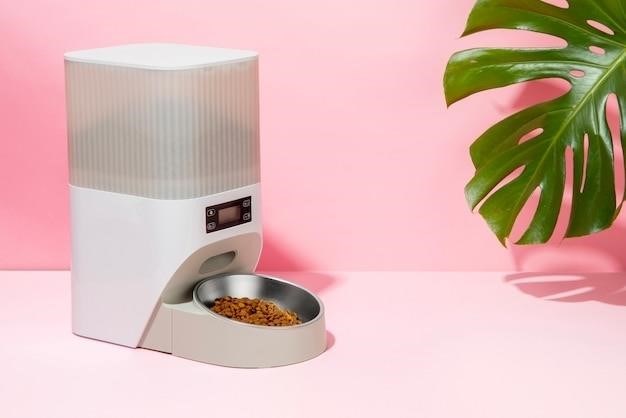
The Pitpet Automatic Pet Feeder is a convenient and reliable solution for busy pet owners who want to ensure their pets are well-fed even when they are not at home. With its automatic feeding feature, this feeder eliminates the need for manual feeding, making it ideal for pet owners who have unpredictable schedules or are frequently away from home.
Introduction
Welcome to the comprehensive guide for the Pitpet Automatic Pet Feeder. This manual is your one-stop resource for understanding the features, setup, operation, and maintenance of this innovative pet feeding solution. Whether you’re a new pet owner or a seasoned veteran, this guide will equip you with the knowledge to ensure your furry companion enjoys consistent and reliable meals, even when you’re away.
The Pitpet Automatic Pet Feeder is a revolutionary device designed to simplify pet care and provide peace of mind for busy pet owners. It empowers you to maintain a consistent feeding schedule for your pets, promoting their health and well-being; This manual will guide you through each aspect of the feeder, from initial setup to programming feeding schedules and troubleshooting common issues. By the end of this guide, you’ll be confident in your ability to utilize the Pitpet Automatic Pet Feeder to its full potential.
So, let’s delve into the world of automated pet feeding and discover how the Pitpet Automatic Pet Feeder can become an indispensable part of your pet’s routine, ensuring they receive the nourishment they need, whenever they need it.
Key Features of the Pitpet Automatic Pet Feeder
The Pitpet Automatic Pet Feeder boasts a range of features designed to provide convenience, flexibility, and peace of mind for pet owners. Here’s a closer look at its key functionalities⁚
- Programmable Feeding Schedules⁚ Set up multiple feeding times throughout the day to accommodate your pet’s dietary needs and your schedule.
- Portion Control⁚ Adjust the portion size for each feeding to ensure your pet receives the appropriate amount of food.
- Voice Recording Feature⁚ Record a personalized message that plays during feeding time, encouraging your pet to approach the feeder.
- Dual Power Supply⁚ The feeder operates on both AC power and battery backup, ensuring uninterrupted feeding even during power outages.
- LCD Display⁚ A clear LCD screen provides intuitive control and displays feeding schedules, portion sizes, and other settings.
- Large Capacity Food Tank⁚ The spacious food tank can hold a significant amount of dry food, reducing the frequency of refills.
- Easy-to-Clean Design⁚ The Pitpet Automatic Pet Feeder is designed for simple disassembly and cleaning, ensuring hygienic food dispensing.
With its impressive array of features, the Pitpet Automatic Pet Feeder offers a comprehensive solution for pet owners seeking a convenient and reliable way to feed their furry companions.
Setting Up Your Pitpet Automatic Pet Feeder
Setting up your Pitpet Automatic Pet Feeder is a straightforward process, designed to be user-friendly for pet owners of all levels of tech-savviness. Here’s a step-by-step guide to get you started⁚
- Unpack the Feeder⁚ Carefully remove all components from the packaging.
- Insert Batteries⁚ Open the battery compartment located at the bottom of the feeder and install the required batteries.
- Connect Power Adapter⁚ Plug the AC power adapter into the feeder and a wall outlet.
- Position the Feeder⁚ Place the feeder on a level surface in a location easily accessible to your pet.
- Fill the Food Tank⁚ Remove the food tank, fill it with your pet’s dry food, and securely attach it back to the feeder.
- Place the Food Tray⁚ Align the food tray with the feeder, ensuring it’s properly positioned.
- Set the Clock⁚ Navigate to the “CLOCK” setting on the control panel and adjust the time.
- Program Feeding Schedules⁚ Use the “TIMER” and “SET” buttons to program your desired feeding times and portion sizes.
Once these initial setup steps are completed, your Pitpet Automatic Pet Feeder is ready to provide consistent and reliable meals for your pet.
Understanding the Control Panel
The Pitpet Automatic Pet Feeder’s control panel is your gateway to customizing your pet’s feeding schedule and managing various settings. This intuitive interface features a series of buttons and an LCD screen that displays information and prompts. Here’s a breakdown of the key components⁚
- CLOCK⁚ This button displays the current time and allows you to adjust it for accurate feeding schedules.
- TIMER⁚ This button switches between preset feeding times, allowing you to program multiple meal times throughout the day.
- VOL⁚ This button controls the feeding volume or portion size, allowing you to adjust the amount of food dispensed for each meal.
- SET⁚ This button enters “SET” mode, confirming feeding times and advancing to the next setting. It’s also used in conjunction with the “VOL” button for manual feeding.
By understanding the functions of these buttons and the information displayed on the LCD screen, you can easily program and manage your Pitpet Automatic Pet Feeder to meet your pet’s specific dietary needs.
Programming Feeding Schedules
The Pitpet Automatic Pet Feeder empowers you to create customized feeding schedules that align with your pet’s dietary needs and your lifestyle. To program your feeder, you’ll navigate through the control panel using the “CLOCK,” “TIMER,” and “SET” buttons. Here’s a step-by-step guide⁚
- Set the Time⁚ Press the “CLOCK” button and use the arrow keys to adjust the time to match your current time zone.
- Enter Programming Mode⁚ Press the “TIMER” button to enter the programming mode. The screen will display the available feeding slots (e.g., Meal 1, Meal 2).
- Program Feeding Times⁚ Press the “SET” button to access the desired feeding slot. Use the arrow keys to set the hour and minute for each meal. Confirm your selection by pressing “SET” again.
- Repeat for Additional Meals⁚ Repeat steps 3 and 4 for any additional meals you want to program. The feeder allows you to program up to four meals per day.
Once you’ve programmed your desired feeding times, the Pitpet Automatic Pet Feeder will dispense food at those precise intervals, ensuring your pet receives their meals on schedule.
Adjusting Portion Sizes
The Pitpet Automatic Pet Feeder offers precise portion control, allowing you to tailor each meal to your pet’s specific dietary requirements. To adjust the portion sizes, you’ll use the “VOL” button on the control panel⁚
- Enter Portion Control Mode⁚ Press the “VOL” button to access the portion control mode. The screen will display the current portion size for the selected meal.
- Adjust Portion Size⁚ Use the arrow keys to increase or decrease the portion size. The feeder typically measures portion sizes in grams or milliliters, depending on the model.
- Confirm Portion Size⁚ Once you’ve set the desired portion size, press the “SET” button to confirm your selection. The feeder will remember your setting for that particular meal.
To ensure your pet’s well-being, consult your veterinarian to determine the appropriate portion sizes for your pet’s breed, age, weight, and activity level. Regularly monitoring your pet’s weight and adjusting portion sizes accordingly will help maintain their optimal health.
Using the Voice Recording Feature
The Pitpet Automatic Pet Feeder incorporates a voice recording feature that allows you to personalize mealtime for your furry friend. This feature can be particularly helpful for pets who rely on auditory cues to recognize mealtimes. To utilize the voice recording feature, follow these steps⁚
- Access the Recording Mode⁚ Locate the microphone button on the control panel and press it to enter the recording mode.
- Record Your Message⁚ Speak clearly and distinctly into the microphone, recording a short message such as “Dinner time!” or “It’s time to eat.” The feeder will typically have a time limit for recording, so keep your message concise.
- Save the Recording⁚ Once you’ve finished recording, press the microphone button again to save your message.
The feeder will now play your recorded message when it’s time for your pet’s meal, helping them associate the sound with feeding time. This can be a great way to encourage your pet to come to the feeder promptly and enjoy their meals.
Troubleshooting Common Issues
While the Pitpet Automatic Pet Feeder is designed for reliable operation, occasional issues can arise. Understanding common problems and troubleshooting steps can help you maintain a smooth feeding routine for your pet. Here are some common issues and their solutions⁚
- Food Jamming⁚ If the feeder experiences food jamming, it will typically stop feeding and wait for 10 minutes. The voice recording will be played three times every two minutes to call the pets. If the pets finish the food in the tray, the feeder will resume its scheduled feeding. However, if food continues to jam, you can try manually dislodging the blockage by gently shaking the feeder or using a utensil to remove any stuck food particles.
- Power Outages⁚ In the event of a power outage, the Pitpet Automatic Pet Feeder will switch to battery power, ensuring uninterrupted feeding for a limited time. If the power outage persists, you may need to manually dispense food for your pet.
For more complex issues, consult the user manual or contact Pitpet customer support for assistance.
Maintaining Your Pitpet Automatic Pet Feeder
Regular maintenance is crucial for ensuring the longevity and optimal performance of your Pitpet Automatic Pet Feeder. Following these simple steps will help keep your feeder clean, functional, and ready to provide your pet with consistent meals⁚
- Cleaning and Lubrication⁚ Regularly clean the feeder’s food storage and dispensing components, including the food tray, to prevent the accumulation of dirt, dust, or food particles. Use a damp cloth to wipe down the exterior and interior surfaces. For hard-to-reach areas, you can use a small brush or a cotton swab. If necessary, lightly lubricate the feeder’s moving parts, such as the dispensing mechanism, with pet-safe lubricant to ensure smooth operation.
- Battery Replacement⁚ The Pitpet Automatic Pet Feeder is equipped with a battery backup system. When the battery indicator signals low power, replace the batteries with fresh ones to ensure continuous operation during power outages.
By adhering to these maintenance practices, you can extend the life of your Pitpet Automatic Pet Feeder and ensure reliable feeding for your pet.
Cleaning and Lubrication
Keeping your Pitpet Automatic Pet Feeder clean and lubricated is essential for its smooth operation and to prevent food spoilage. Here’s a step-by-step guide⁚
- Unplug the Feeder⁚ Before cleaning, always unplug the feeder from the power source to prevent any electrical hazards.
- Empty the Food Hopper⁚ Remove any remaining food from the hopper and discard it. Wash the hopper thoroughly with warm, soapy water and a soft brush. Rinse thoroughly and allow it to air dry completely.
- Clean the Food Tray⁚ Remove the food tray and wash it with warm, soapy water. Pay special attention to any food residue or build-up in the dispensing mechanism. Rinse thoroughly and allow it to air dry completely.
- Clean the Exterior⁚ Wipe down the exterior of the feeder with a damp cloth and mild soap. Avoid using abrasive cleaners or harsh chemicals that could damage the feeder’s surface.
- Lubricate Moving Parts⁚ Apply a small amount of pet-safe lubricant to the moving parts of the feeder, such as the dispensing mechanism, to ensure smooth operation. Avoid over-lubricating as this could attract dirt and dust.
- Reassemble and Test⁚ Once all parts are clean and dry, reassemble the feeder and test it for proper functionality.
Follow these cleaning and lubrication procedures regularly to keep your Pitpet Automatic Pet Feeder in optimal condition.
Battery Replacement
The Pitpet Automatic Pet Feeder is equipped with a backup battery system to ensure continuous operation even during power outages. Here’s how to replace the batteries⁚
- Locate the Battery Compartment⁚ The battery compartment is typically located on the bottom of the feeder. You may need to remove a cover or panel to access it.
- Remove Old Batteries⁚ Carefully remove the old batteries from the compartment. Make sure to dispose of them properly according to your local recycling guidelines.
- Insert New Batteries⁚ Insert new batteries of the same type and size as the originals. Ensure that the batteries are installed with the correct polarity (+ and -). Refer to the user manual for the specific battery type required for your model.
- Secure the Battery Compartment⁚ Close the battery compartment securely and ensure that the cover or panel is properly attached.
- Test the Feeder⁚ After replacing the batteries, test the feeder to ensure that it is working properly. You should hear a brief chime or see a light indicating that the batteries are properly installed and functional.
It’s recommended to replace the batteries at least once a year or sooner if you notice a decrease in the feeder’s performance. Always use high-quality batteries to ensure reliable operation.
Troubleshooting Food Jamming
Food jamming is a common issue with automatic pet feeders, and the Pitpet feeder is no exception. Here are some steps to troubleshoot and resolve food jamming⁚
- Check the Food Tray⁚ The most common cause of food jamming is a blockage in the food tray. Carefully remove the tray and inspect it for any food particles or debris that may be obstructing the food dispensing mechanism. Clean the tray thoroughly with a damp cloth or sponge.
- Inspect the Food Dispenser⁚ If the tray is clear, the food dispenser itself may be clogged. Carefully inspect the dispenser for any food particles or debris. Use a small brush or a toothpick to remove any obstructions.
- Adjust the Food Size⁚ If the food particles are too large or too dense, they may be getting stuck in the dispenser. Try adjusting the food size by using smaller kibble or by crushing larger pieces.
- Restart the Feeder⁚ After cleaning the food tray and dispenser, restart the feeder. This may help to dislodge any remaining obstructions.
- Contact Customer Support⁚ If you’ve tried all of the above steps and the feeder is still experiencing food jamming, contact Pitpet customer support for further assistance. They may be able to provide additional troubleshooting tips or suggest a solution.
Regular cleaning and maintenance of the feeder can help to prevent food jamming in the future.
Troubleshooting Power Outages
Power outages can disrupt the functionality of your Pitpet Automatic Pet Feeder, leaving your pet without food. Here’s how to handle power outages and ensure your pet’s feeding schedule remains uninterrupted⁚
- Battery Backup⁚ The Pitpet Automatic Pet Feeder comes equipped with a battery backup system. This battery provides a limited amount of power in case of a power outage. Check the battery’s charge level and ensure it’s sufficient to cover the duration of the outage.
- Manual Feeding⁚ If the power outage is prolonged or the battery backup is insufficient, you’ll need to manually feed your pet. Provide a portion size that matches your pet’s usual feeding schedule.
- Restart the Feeder⁚ Once the power is restored, restart the Pitpet Automatic Pet Feeder. The feeder will automatically resume its normal feeding schedule.
- Monitor the Feeder⁚ After a power outage, it’s a good idea to monitor the feeder for a few days to ensure it’s functioning properly. Check the food dispensing mechanism and the battery backup level.
- Consider a UPS⁚ For frequent power outages or extended periods without power, consider investing in an uninterruptible power supply (UPS) for your feeder. A UPS provides a continuous power source, ensuring the feeder remains operational even during power outages.
By following these steps, you can effectively manage power outages and ensure your pet’s feeding needs are met, even when the power is out.